Disclosure: This post contains affiliate links that help support Mary Makes Good
Pressed Flower Bath Melts – An all-natural DIY recipe for flower-scented moisturizing bath goodies.

I am crazy for baths lately. Mostly, I’ve been indulging in salty magnesium baths, but every now and then I get an urge to moisturize instead. Bath melts are one of my favorite recipes to stock up on for bath season. I make a few big batches and stash them in my fridge for the winter. Since bath melts tend to be on the soft side, this helps keep them in good shape even if I don’t use them right away.
These pressed flower bath melts provide a cheerful respite from gloomy winter weather. Embellished with colorful pressed flowers and scented with a blend of pretty floral essential oils, they are perfect for fighting winter blues. Mandarin and rose are even used to battle depression in aromatherapy.
Make sure to stash your melts in an airtight container – especially if you are using essential oils to scent them. If you don’t cover them well they can end up making your whole fridge smell like flowers. Or, vice versa, your bath melts could end up smelling like last night’s leftovers. Pad Thai may be delicious, but I don’t really want my bath tub to smell like it.
I used regular refined coconut oil for this recipe, but feel free to use virgin coconut if you prefer. Just keep in mind that virgin coconut will give your melts a stronger coconut aroma. You can also swap the shea butter for another kind – like mango or cocoa butter. Cocoa butter will give the melts a chocolate scent, and since the butter is harder than shea, the melts will probably take a little longer to melt in the tub.

Pressed Flower Bath Melts
Makes about 12 1/2-ounce melts
Ingredients
- 3 ounces shea butter
- 1 ounce coconut oil
- 2 tablespoons oat flour
- 1/8 teaspoon mandarin essential oil
- 1/8 teaspoon lavender essential oil
- 1/8 teaspoon Roman chamomile essential oil
- 1/8 teaspoon rose essential oil
- 12 pressed flowers
Directions
- Gently heat coconut oil and shea butter until fully melted. I like to use a double boiler for this but you can also use the microwave in short 30-second bursts or place a mason jar in a saucepan 1/3 filled with water.
- Remove oils from heat and whisk in oat flour followed by essential oils.
- Place pressed flowers into the bottom of a silicone candy mold. Pour a few big drops of the oil mixture into each mold cavity and press down flowers to secure them to the bottom.
- Chill the mold in your refrigerator for about 10-15 minutes – just long enough to solidify that first layer.
- Pour the remaining oil mixture into the molds, then chill again for about 30 minutes to finish hardening the melts.
To Use
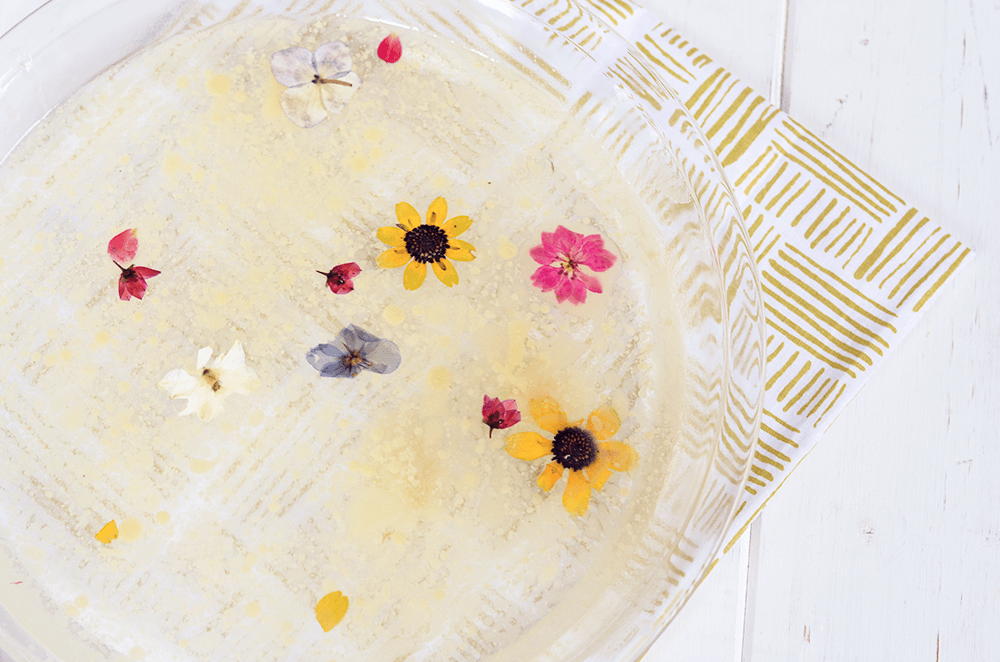
Pop 1 – 3 bath melts into hot bath water. The melts will slowly liquify, leaving pretty flowers floating in the tub.

Looking for more fun bath and body projects? Check out my recipes for Honey Rose Salt Scrub and Orange Blossom Vanilla Bean Milk Bath.